Installing CloudForest, and utilizing the Cipres Rest API to infer trees
1. Install and run Docker
Installation directions vary by operating system. Detailed instructions can be found here. Once downloaded and run, Docker runs in the background.
NOTE: If using Windows, it is recommended to download and install a WSL 2 linux instance on your computer for easier integration with Docker upon install. More details on installing WSL 2 can be found here.
2. Create a Cipres Rest API account
Registration can be completed here. After your account is created, no further account configuration is necessary. The credentials you create in this step will be used by CloudForest for remote job submission.
NOTE: Steps 3-4 are necessary in the Beta release of CloudForest, but will not be present in the final release. Instead, CloudForest will be packaged for easy installation and running
3. Clone and Navigate to the CloudForestDocker repository
Once Docker is installed and is running in the background, navigate to your preferred directory from a Unix command line and run the following commands:
$ git clone -b beta_testing https://github.com/TreeScaper/CloudforestDocker.git
$ cd CloudforestDocker
4. Run CloudForest
From within the CloudForestDocker directory, run the following command:
$ ./run.sh --tag beta_testing
- This will pull the beta image of CloudForest from the public Docker registry, and start it in a container. Inside the container, a web server will start that houses CloudForest. After running the command, you will be prompted for your CRA credentials.
NOTE: Because this step passes information to your machine’s Docker application unencrypted, this should only be performed on a personal computer. Solutions are in the works for a fully secure method of providing third-party credentials to the framework underlying CloudForest.
5. Open CloudForest
CloudForest runs as a web server within the Galaxy Framework. ~20 seconds after the installation command finsihes, navigate to http://localhost:8080 within your browser to access CloudForest.
NOTE: The remaining steps of the tutorial will carry out a sample analysis to conduct maximum likelihood analysis via IQTree for a set of alignments. To follow along, download the data here
6. Upload Data
The lefthand side of the Galaxy interface is the Tool Panel. After you download and decompress the sample data, follow these steps to upload the individual alignments:
- Expand the Get Data tab
- Open the Upload File tool
- Select Choose Local File, navigate to the folder containing the sample alingments, and select all of them.
- Once all files are selected, click Start to upload them
- When uploads are complete, click Close to return to the homepage
-
When a file’s history item turns green after uploading, the file has been processed and is ready to use
On the right-hand side you will see new history items for your files. Each of these (if you uploaded multiple files) represents both the Galaxy job that handled the upload, as well as the uploaded file. Input data should be formatted according to the specifications of your program of choice. Here, our sample data takes the Fasta format.
7. Create a Collection
By grouping multiple files into a collection, we can pass them more easily as one unit to a single Galaxy job. To create a collection of your sequence files:
-
Click the checkbox above the history of the items labeled Operations on Multiple Datasets (pictured below)

- Select your desired files, or click All to select all files in the history.
- In the For all selected dropdown menu, select Build Dataset List.
- Name the list (also referred to as a Collection) however you like, and select Create List.
- Click the Operations on multiple datasets checkbox again to collapse the view.
8. Open the TreeScaper-CRA tool
Expand the CloudForest category in the tool panel and select TreeScaper-CRA.
9. Select tool and parameters
Multiple tools for tree inference are available, each with its own list of optional parameters. For the purposes of this tutorial, we will be using IQTree. Once the tool is selected, you may adjust the optional parameters to best suit your analysis. For the first parameter, Collection of PHYLIP files, select the list you created in Step 7. You may leave the Status file output parameter blank for now.
10. Execute the job
Once all optional parameters are tuned to your liking, select Execute to submit the job. New jobs will populate the History panel on the right side of the screen. Each job will turn yellow upon execution, and green upon completion. If a given job fails, it will turn red. Multiple outputs will be created by this job:
- Parameters: Copy of the parameters file used by TreeScaper.
- Job Status: File that lists each job with fields for the input file, status, and job ID within CRA. In addition to allowing the user to investigate a job further using the CRA, this file can also be input into the tool in the event of an interruption to begin where the previous run left off.
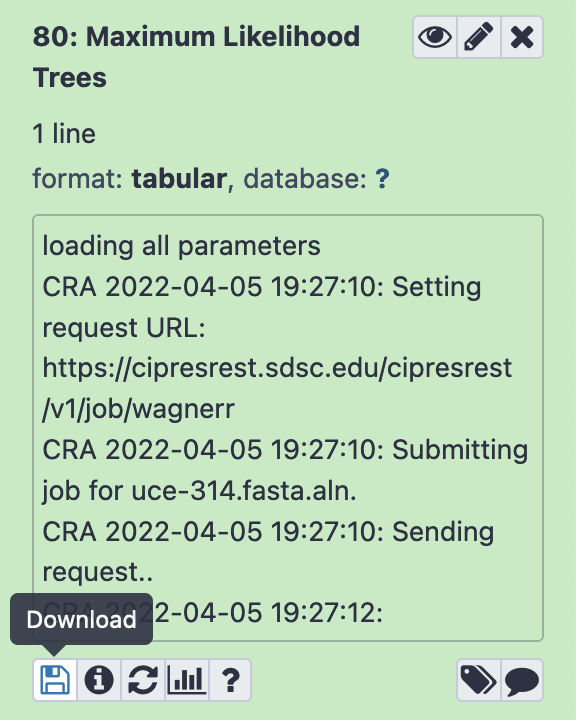
- Mapped Maximum Likelihood Trees: File with a list mapping input files to their corresponding maximum likelihood tree. If a job has failed, in place of its tree will be the string “NO_OUTPUT”.
- Maximum Likelihood Trees: File containing only the trees from successful jobs in newick format.
Output files can be used within CloudForest to perform additional analyses, or they can be downloaded for use in third party programs. To download a file, select the item in the history and press the Download button (pictured below).
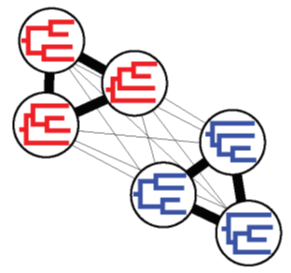
From here, you can interact with the generated trees in any number of ways! Further tutorials will provide insight into how to perform exciting new analyses on sets of trees within CloudForest, such as Community Detection, Bipartition Covariance Analysis, and NLDR!